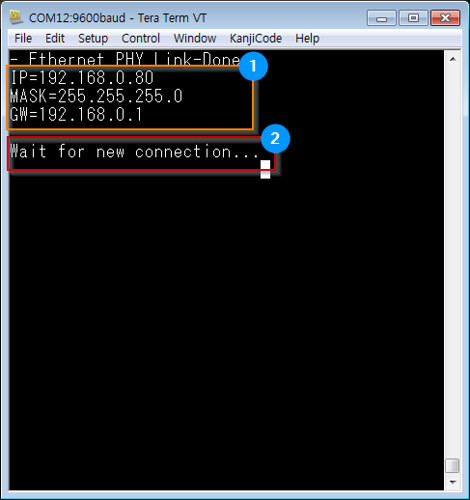
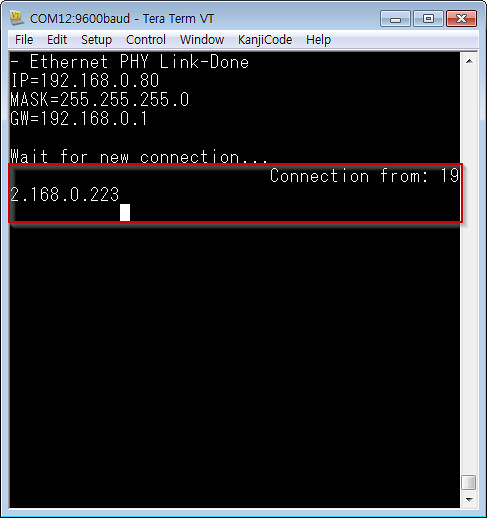
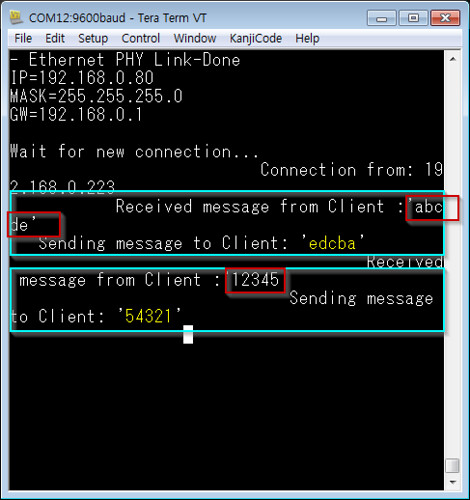
UDP NTP Client
NTP
*Network Time Protocol - wikipedia
*참조:https://blog.cloudflare.com/understanding-and-mitigating-ntp-based-ddos-attacks/
Do UdpNtpClient
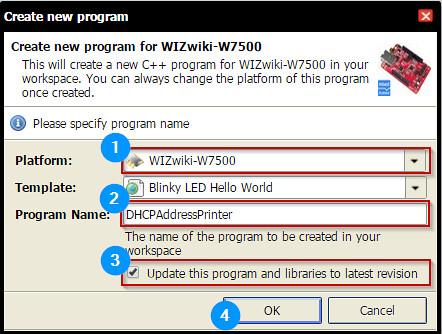
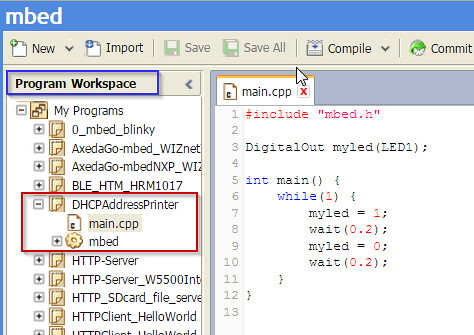
Import Program NTPClinet_HelloWorld: “http://developer.mbed.org/users/embeddist/code/UdpNtpClient/
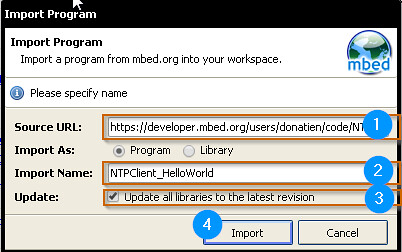
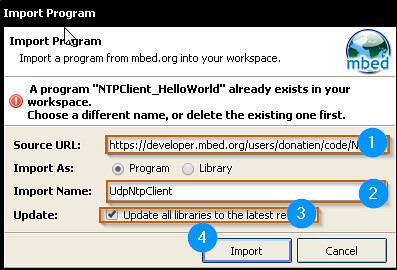
if same program is existed, Import Name of NTPClinet_HelloWorld will be changed(2).
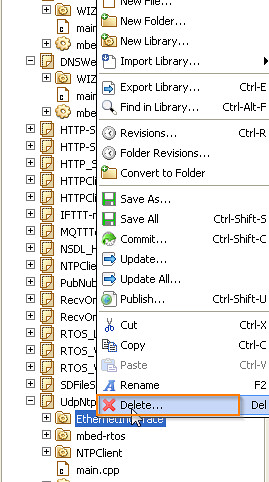
Remove mbed-rtos and EthernetInterface
- Remove mbe-rtos
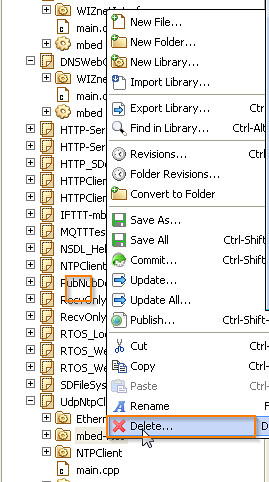
- Remove EethernetInterface
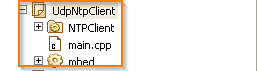
- Directory after removing mbed-rtos & EthernetInterface
- Remove mbe-rtos
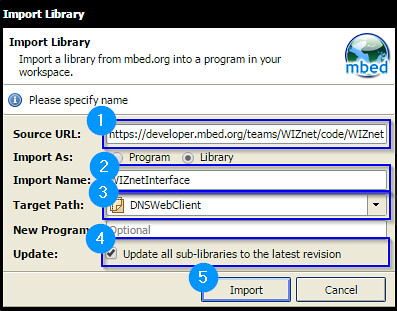
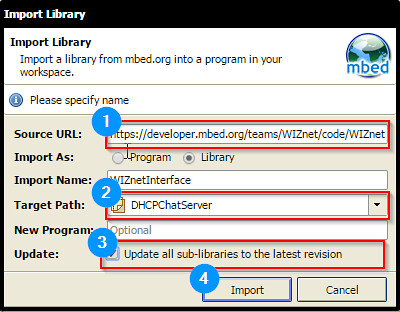
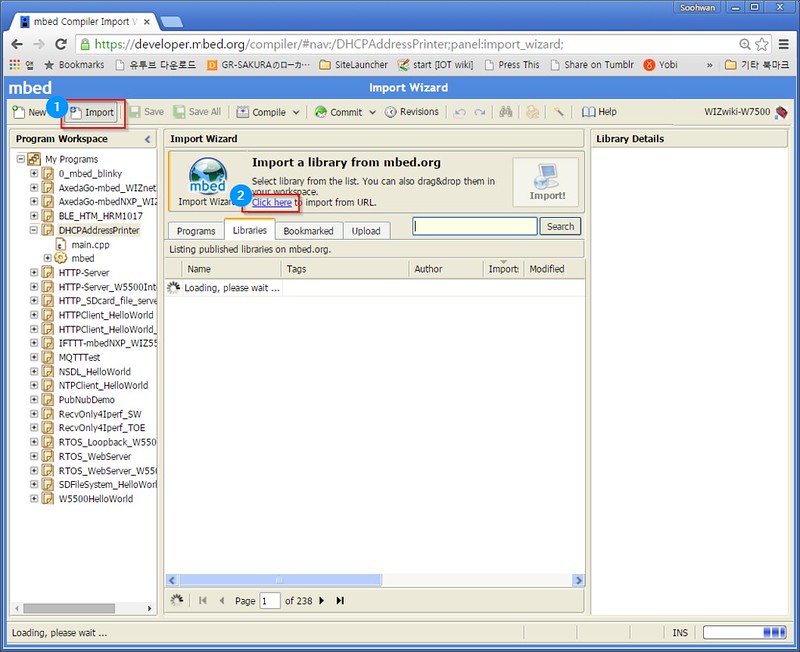
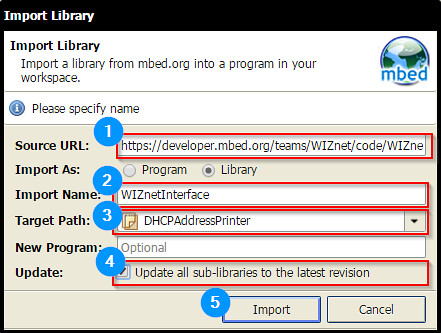
Import WIZnetInterface”https://developer.mbed.org/teams/WIZnet/code/WIZnetInterface/"(1)
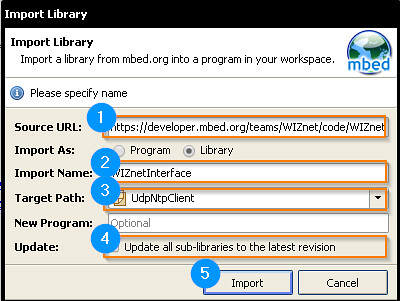
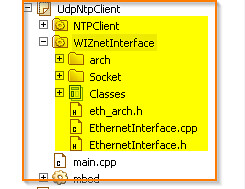
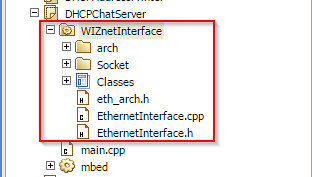
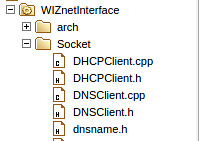
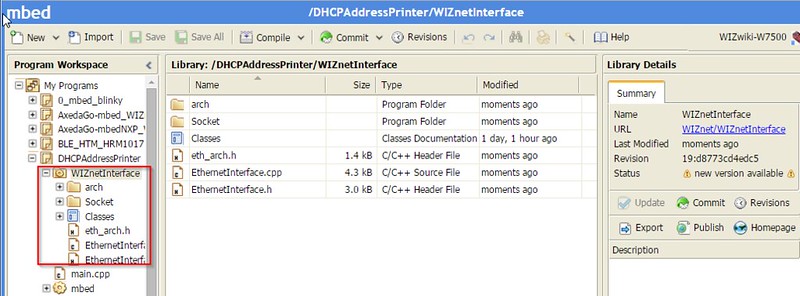
Dirctory for UdpNtpClient
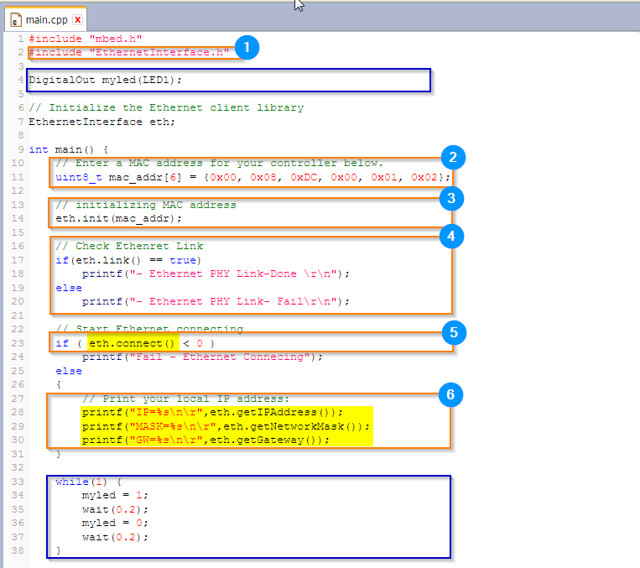
Make Codes: porting to WIZnetInterface from EthernetInterface
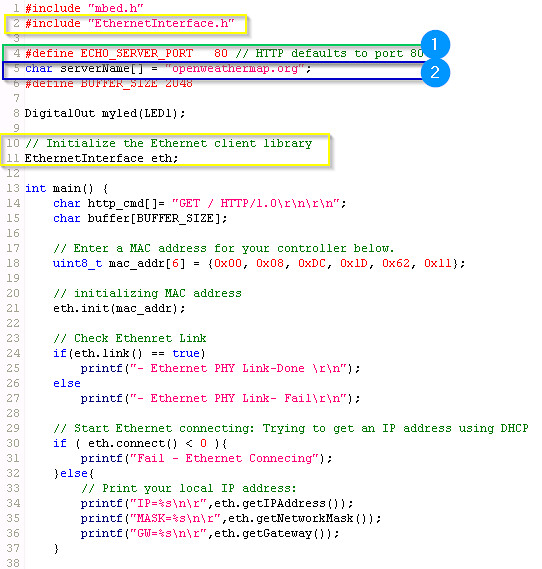
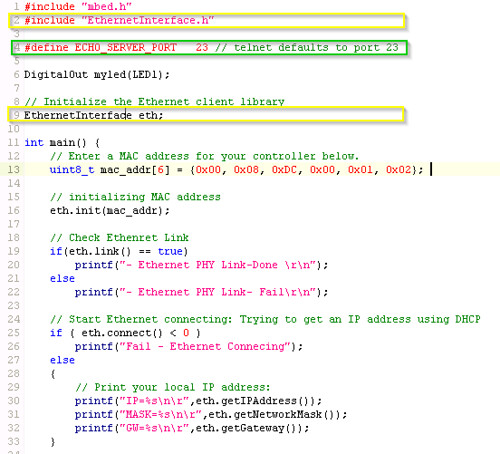
- Add arrange for MAC address, call init(mac_addr) for initialing ethernet class.
- Add arrange for MAC address, call init(mac_addr) for initialing ethernet class.
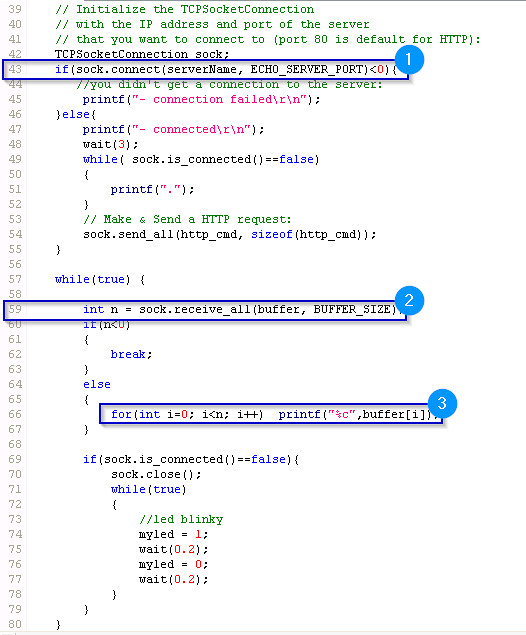
UDP APIs in WIZnetInterface
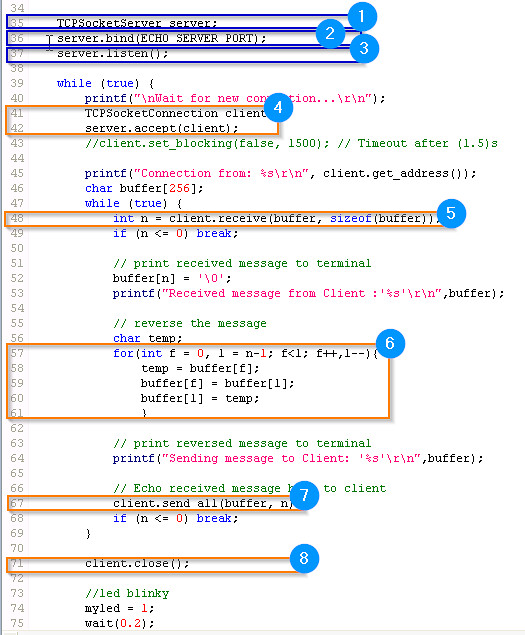
NTPClient.cpp\Bind() in UDP

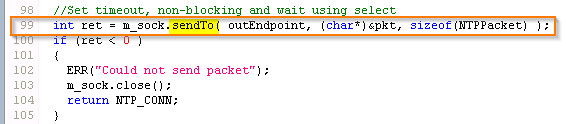
NTPClient.cpp\sendTo(): send in UDP
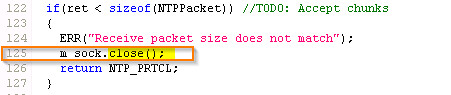
NTPClient.cpp\receiveFrom(): recv in UDP

NTPClient.cpp\Close() in UDP
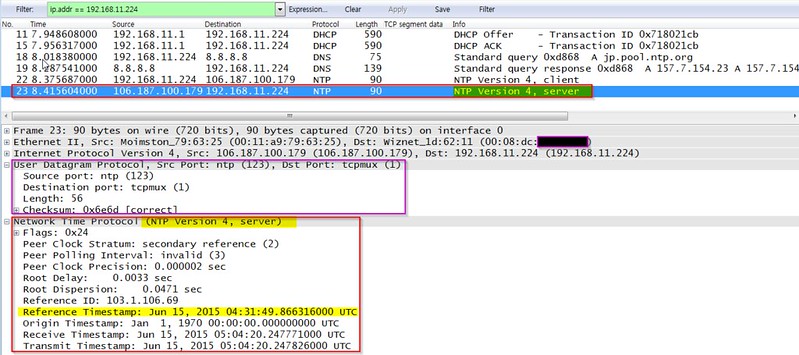
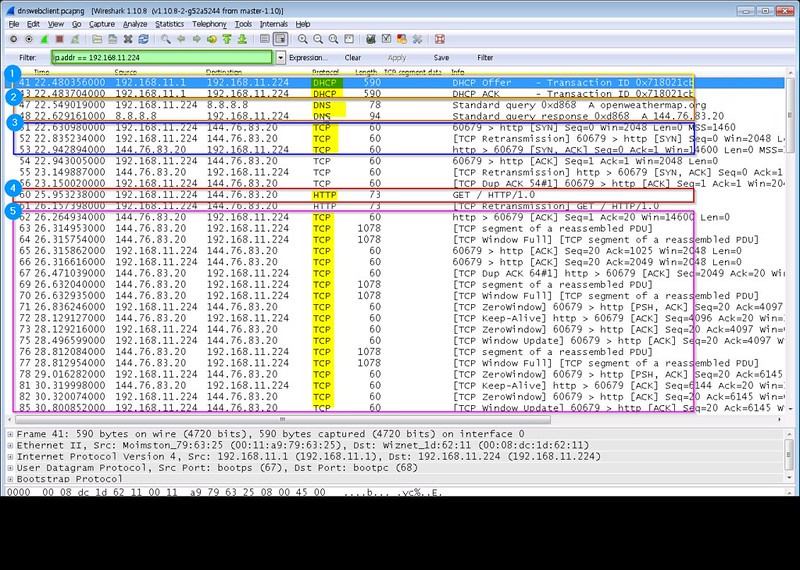
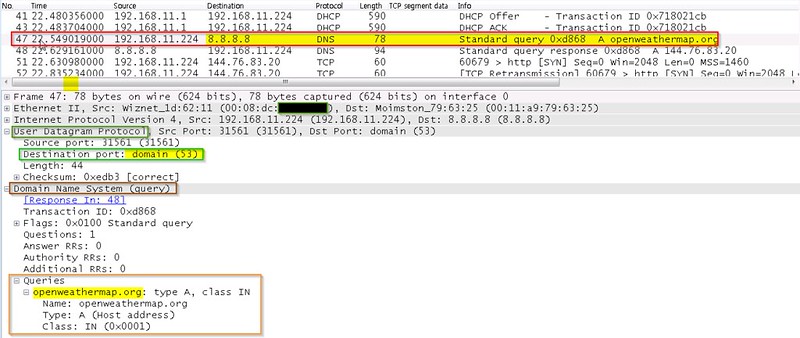
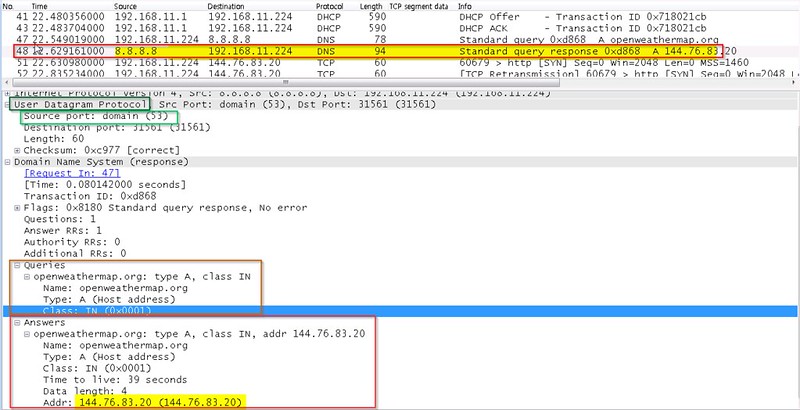
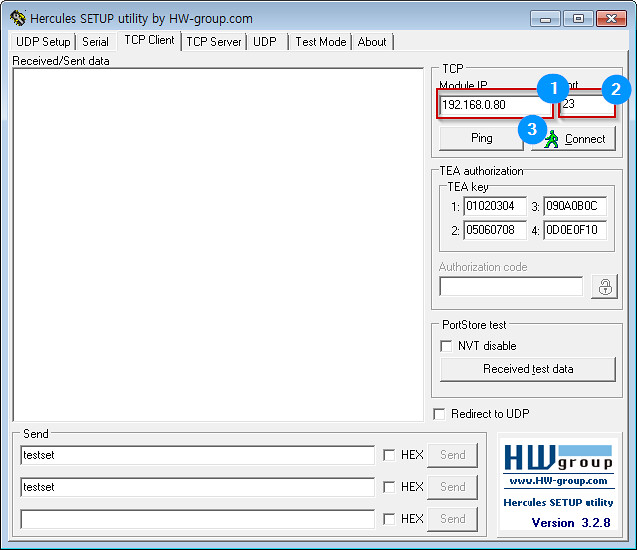
Confirm packets by WireShark
- NTP version 4, clinet
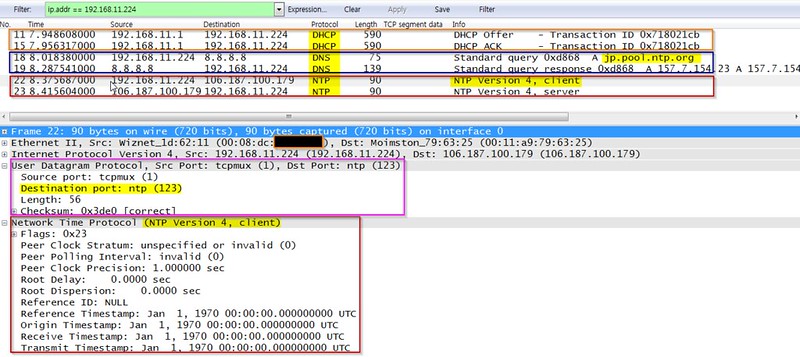
- NTP version 4, server
- NTP version 4, clinet
Code Repository
I will update…
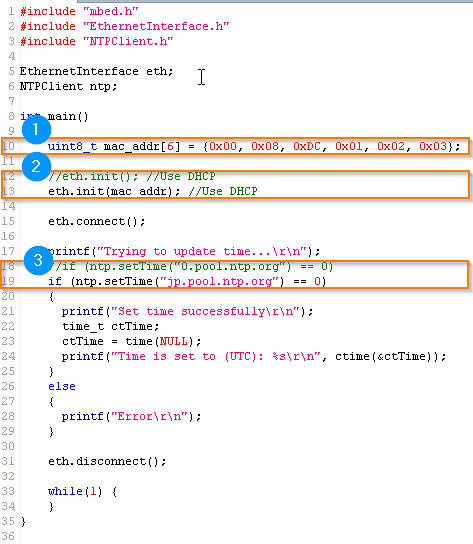
Ref. Code
#include "mbed.h"
#include "EthernetInterface.h"
#include "NTPClient.h"

EthernetInterface eth;
NTPClient ntp;

int main()
{
    uint8_t mac_addr[6] = {0x00, 0x08, 0xDC, 0x01, 0x02, 0x03};

    //eth.init(); //Use DHCP
    eth.init(mac_addr); //Use DHCP

    eth.connect();

    printf("Trying to update time...\r\n");
    //if (ntp.setTime("0.pool.ntp.org") == 0)
    if (ntp.setTime("jp.pool.ntp.org") == 0)
    {
      printf("Set time successfully\r\n");
      time_t ctTime;
      ctTime = time(NULL);
      printf("Time is set to (UTC): %s\r\n", ctime(&ctTime));
    }
    else
    {
      printf("Error\r\n");
    }

    eth.disconnect();

    while(1) {
    }
}


